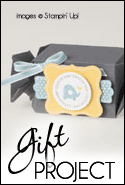
Whatever your base color is: cut (2) 9-1/2" x 5-1/2" pieces of cardstock. Cut (1) 5-1/2" square. On the two larger pieces, score at 4-1/2" and again at 9". Fold on the score lines. On the square piece, score 1/2" on all sides. Cut on one side up to the score line at the end where the score lines meet for form a square. Do the same to the opposite side. Put sticky tape on all four sides of the square. Put sticky tape on the other pieces that are 1/2" scored. You can either put the top on as you assemble the box or assemble the box then put the top on. It doesn't really matter. Oh I forgot, before you assemble the square piece, cut a large oval in the center of the square. You can do this by hand or use the big shot. Once assembled, you can decorate as you wish. Mine was winter themed, but I am going to do a butterfly one to match my butterfly bathroom. I might also do a halloween one after that. They are put together quickly. It is the decorating that can take some time. You could decorate it also before it is assembled, your choice. I hope this helps.















.jpeg)


3 comments:
Jennifer, thanks so much for sharing the detailed instructions. Will have to attempt making one of these when time permits.
bdlakebum at yahoo dot com
Thanks so much for the instructions Jen!! Will definitely be making my own.
kowal6211@verizon.net
Thanks for sharing the instructions Jennifer! Looks like its fairly simple but I'm glad you did the math!
jlfstudio at live.com
Post a Comment